Although Windows 11 supports a variety of touchpad gestures for easier navigation, you may prefer to use an external mouse for precision and better ergonomics. If you’ve already abandoned your touchpad, you might want to disable it for good. You may also want to disable the touchpad temporarily so that you don’t accidentally move the mouse cursor while typing.
Disabling the touchpad on your Windows 11 laptop is quick and easy. This post shows different methods for disabling touchpad on Windows 11 laptop.
1. Disable Touchpad Using the Keyboard
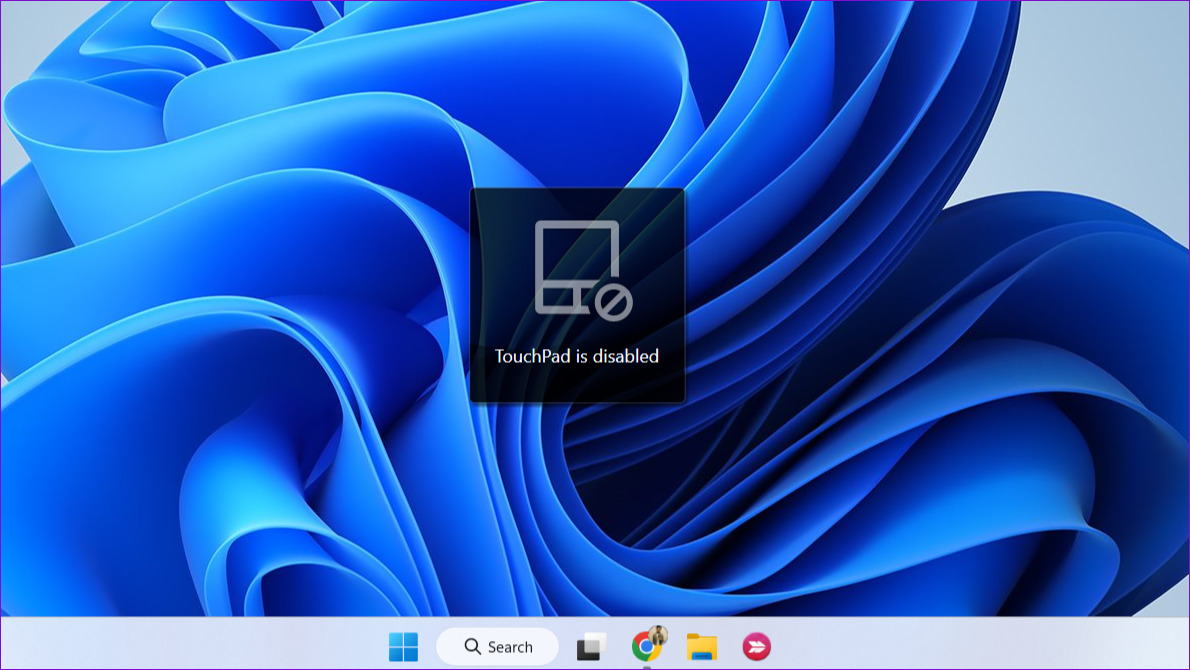
Most laptop keyboards have a function key that allows you to quickly enable or disable the touchpad. On your laptop’s keyboard, locate the function key with the touchpad icon printed on it. Then, press that key together with the Fn key to disable your touchpad. You will see a confirmation message on your screen once the touchpad is disabled.
Pressing the same key combination again will re-enable the touchpad.
2. Disable Touchpad Using the Settings App
The Windows 11 Settings app makes it easy to modify things like touchpad gestures, sensitivity, cursor speed, and more. It also gives you the option to disable the touchpad. Here’s how to access it.
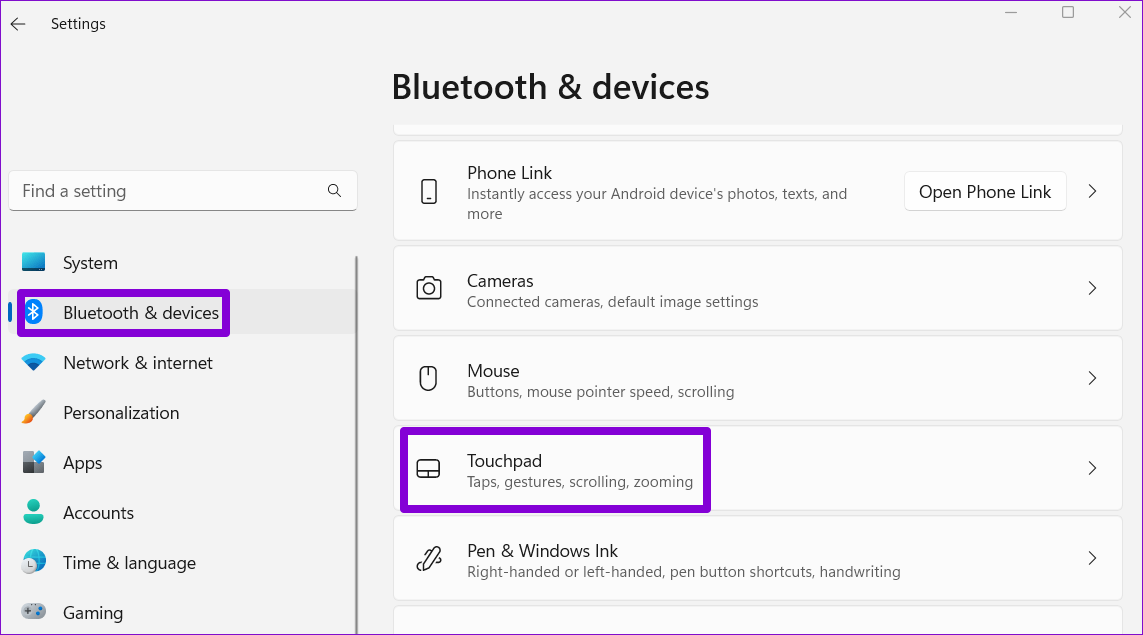
Step 1: Open the Start menu and click the gear-shaped icon to launch the Settings app.

Step 2: Select Bluetooth & devices from the left sidebar. Then, click on Touchpad.
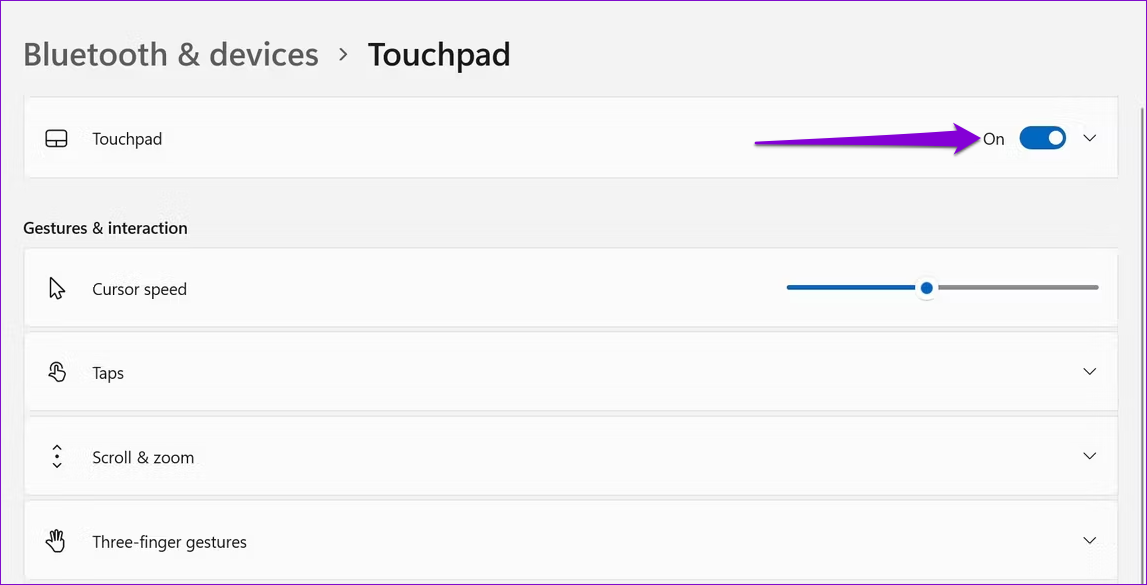
Step 3: Toggle off the switch next to Touchpad.
3. Disable Touchpad via Control Panel
With Windows 11, Microsoft moved many classic Control Panel applets to the Settings app. However, Control Panel is still available on Windows 11. So, if you prefer using the Control Panel over the Settings app, you can employ the following steps to disable the touchpad.
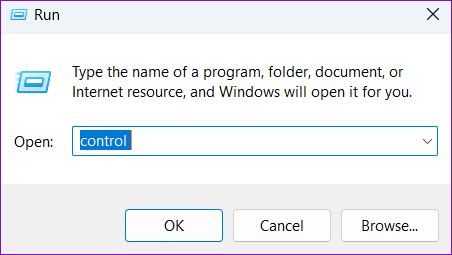
Step 1: Press the Windows key + R to open the Run dialog. Type control in the box and press Enter to open Control Panel.
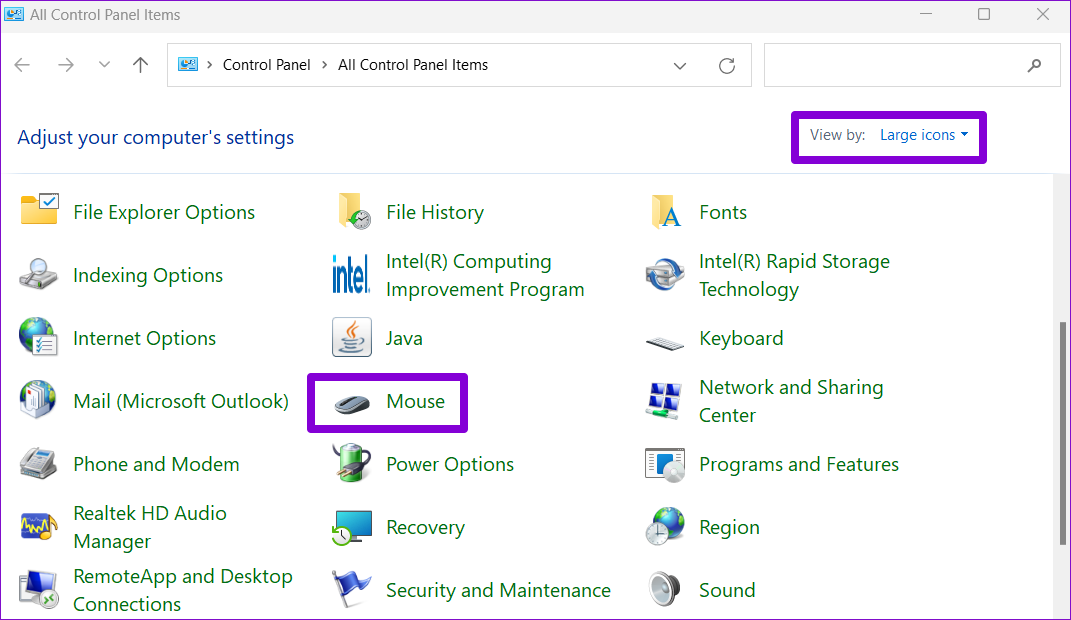
Step 2: In the Control Panel window, use the drop-down menu in the top-right corner to change the view type to Large icons. Then, click on Mouse.
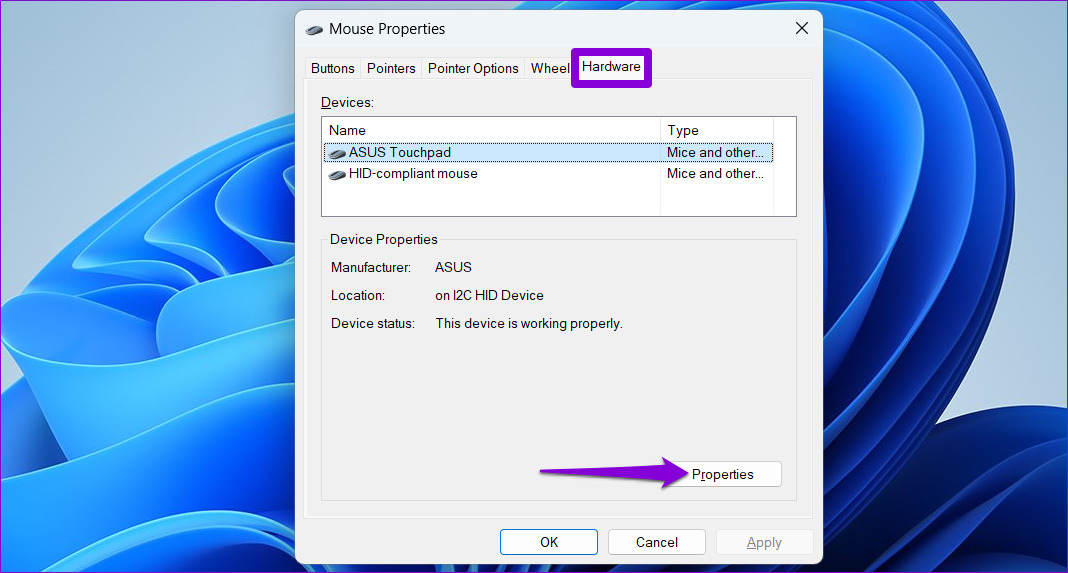
Step 3: Under the Hardware tab, select your touchpad from the list and click the Properties button.
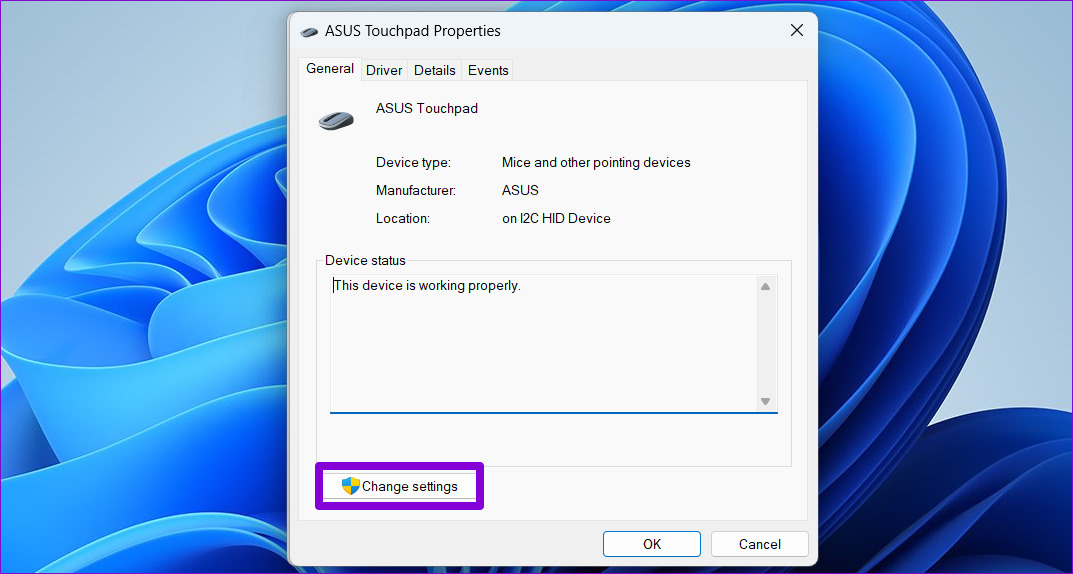
Step 4: Click the Change settings button.
Step 5: Select Yes when the User Account Control (UAC) prompt appears.

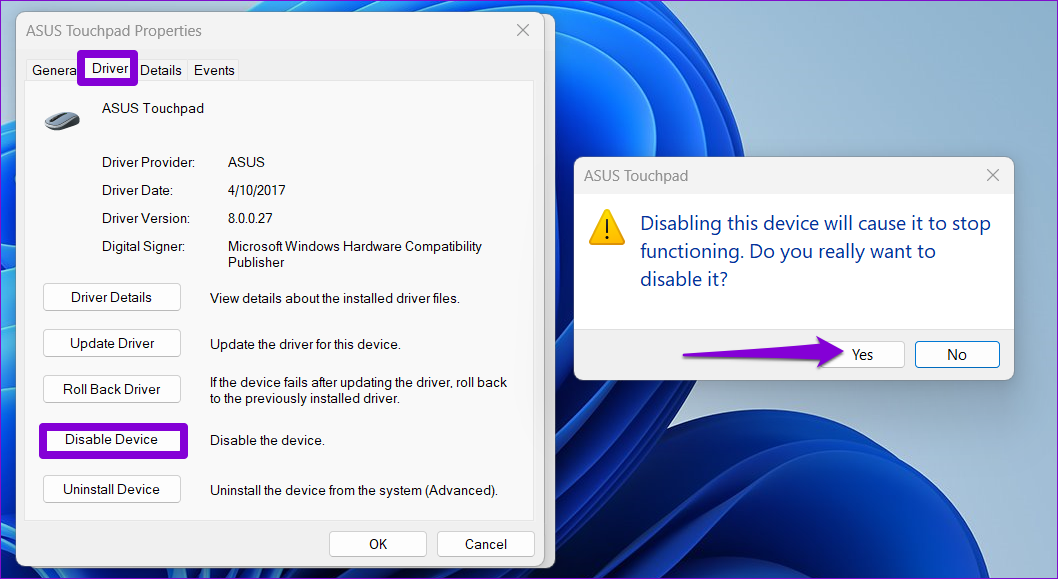
Step 6: Under the Driver tab, click on Disable Device and select Yes to confirm.
4. Disable Touchpad via Device Manager
Device Manager is part of the Microsoft Management Console that lets you view, manage, and troubleshoot various devices connected to your system. It allows you to disable most of your hardware devices, including the touchpad.
Step 1: Right-click on the Start icon or use the Windows key + X shortcut to open the Power User menu. Then, select Device Manager from the list.

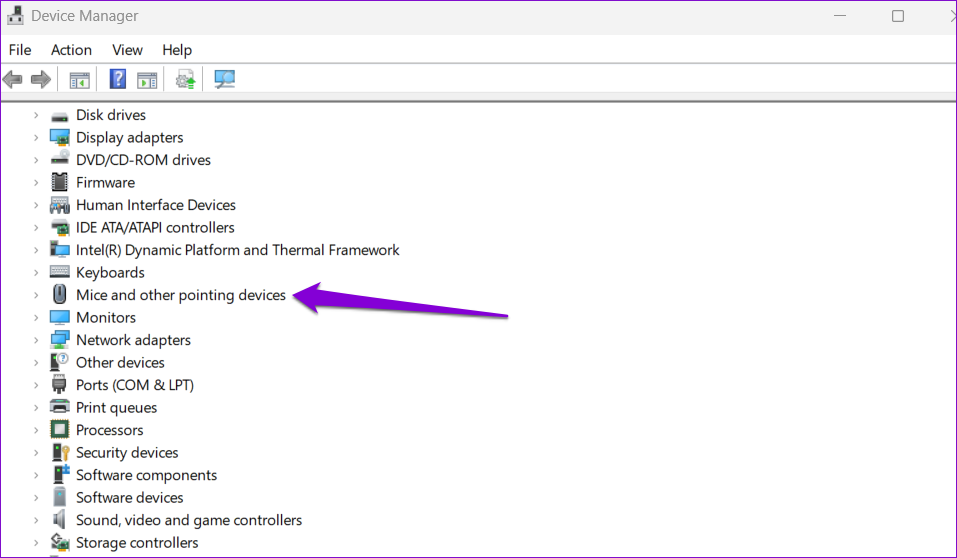
Step 2: Expand the ‘Mice and other pointing devices’ section.
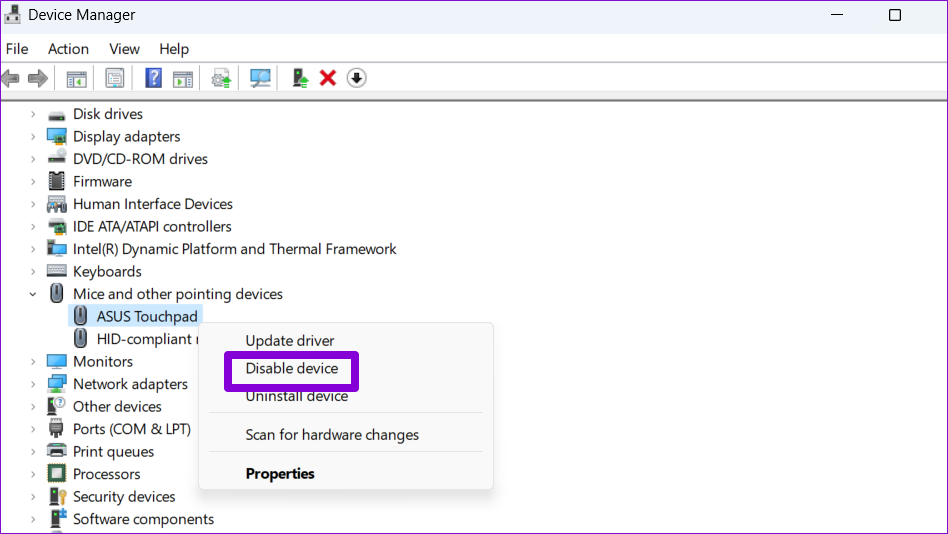
Step 3: Right-click on your touchpad and select Disable device.
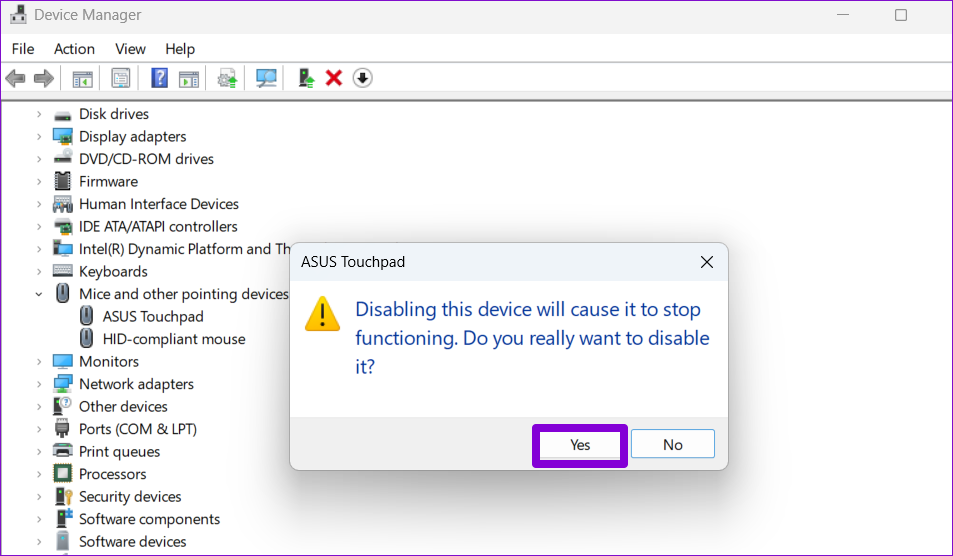
Step 4: Select Yes when the confirmation prompt appears.
5. Disable Touchpad Using Registry Editor
If you’re feeling adventurous, you can disable your laptop’s touchpad by modifying a registry file. The Registry Editor contains critical settings for the Windows operating system. Therefore, you should only use this trick if the other methods fail.
Since editing registry files is risky, it’s a good idea to back up all the Registry files or create a restore point before proceeding with the steps below.
Step 1: Click the search icon on the Taskbar to open the search menu. Type registry editor in the box and select Run as administrator.

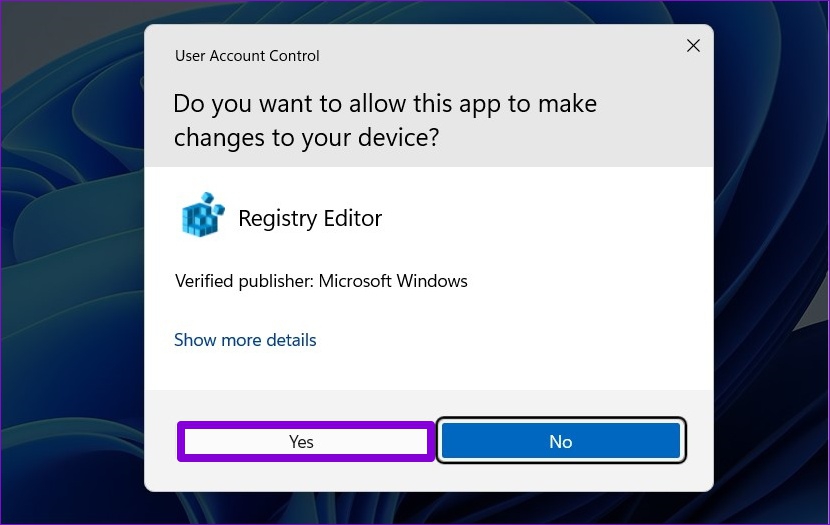
Step 2: When the User Account Control (UAC) prompt appears, select Yes to continue.
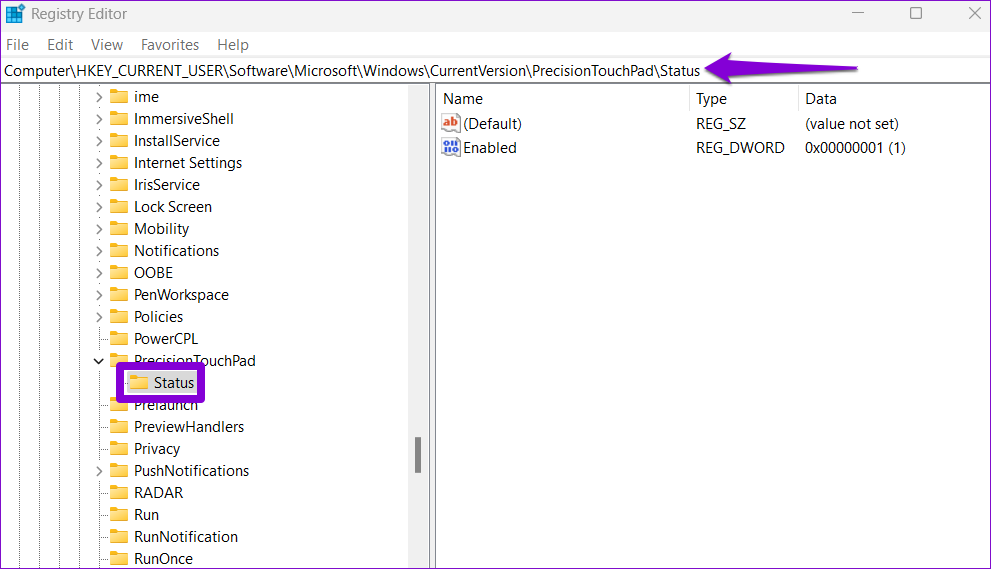
Step 3: In the Registry Editor window, paste the following path in the address bar at the top and press Enter:
ComputerHKEY_CURRENT_USERSOFTWAREMicrosoftWindowsCurrentVersionPrecisionTouchPadStatus
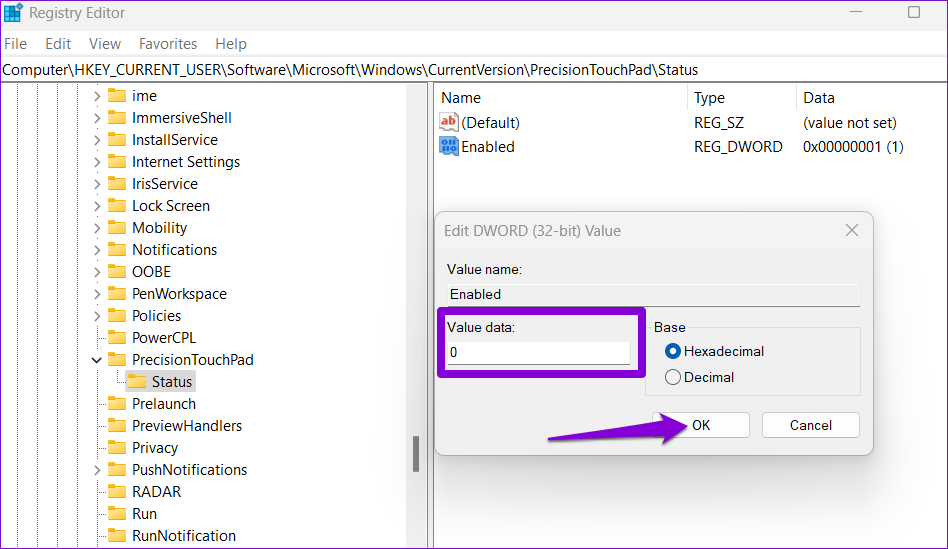
Step 4: Double-click the Enabled entry on the right pane and change its Value data to 0 (zero) to disable the touchpad. Then, click OK.
Exit the Registry Editor window and restart your laptop to apply the changes. Following that, your touchpad will be disabled. If you want to re-enable the touchpad later, use the same steps above and change the Value data of the Enabled entry to 1.
No More Accidental Taps
Using the function key or the Settings app is the way to go if you only need to disable the touchpad for a short time. However, if you’re looking for a permanent solution, you can use Control Panel, Device Manager, or Registry Editor to disable the touchpad on Windows 11. In any case, make sure you keep a mouse handy before disabling your laptop’s touchpad.