Many PC users are hesitant to do their own upgrades, which is no surprise with the cost of upgrades and the ever-present fear of losing delicate components. However, there’s no reason not to install your HDD. Not only will it give you more space for storage on your computer, but it’s also a great starter project for anyone ready to upgrade their computer for the first time.
Benefits of Installing an HDD
The main benefit of installing an HDD is having more space to store things on your computer. However, a few types of hard drives are available, many of which are even slower than an SSD. So why install an HDD?
- Your computer can only have certain types of hard drives hooked up with its available space. M.2 drives are excellent at what they do, but you can’t have many slotted. Most computers have much more room for other types of drives.
- HDD drives tend to offer more space per dollar than others. While newer drive models are faster, they don’t have the same storage capacity without paying much more. HDDs can hold many gigabytes for far less money.
- HDDs are great storage drivers, even if you want to put your operating system and actively-used programs on another, faster type of drive. Images, movies, documents, and more can be saved on an HDD without any kind of problems. Data transfer speeds aren’t as important when retrieving media as when a game is trying to load information in a split second.
Installing an HDD is well worth the time it takes to learn to do it. Just remember that you need to be sure your computer has space for one before you start.
Will I Need Tools to Install an HDD?
You may or may not need a screwdriver, depending on what kind of case you have.

Some cases come with hard drive bays that hold the drive in place without screws. Usually, some kind of pressure setup keeps everything in the right spot. If your computer case doesn’t have that, you’ll need a screwdriver to secure the drive itself to the bay in the computer.

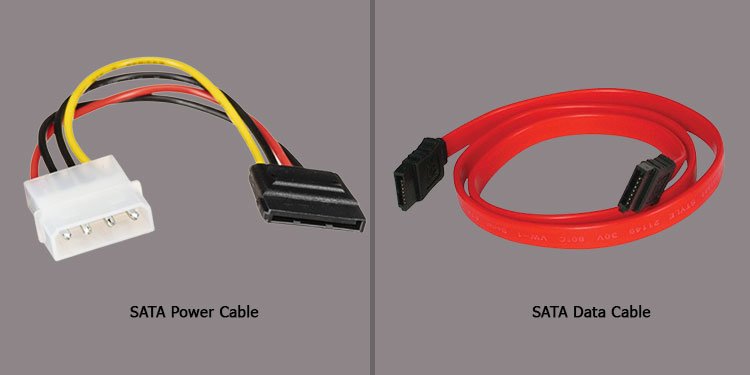
Other than that, all you need are the two cables the hard drive requires: the SATA cable for the motherboard and the power cable from the PSU. The first lets the hard drive interface with your system. The second gives it the power it needs to turn on, record data, and pass it to your other computer components.
Installing an HDD

Two major steps to installing an HDD are getting it into the right place and plugging it in. Once you’ve done so, all that’s left is to test it and ensure it’s interfacing with the system correctly.
Getting It into Position
Look in your computer case to see what kind of bays it has. These are the locations where you can mount the hard drive before connecting it.
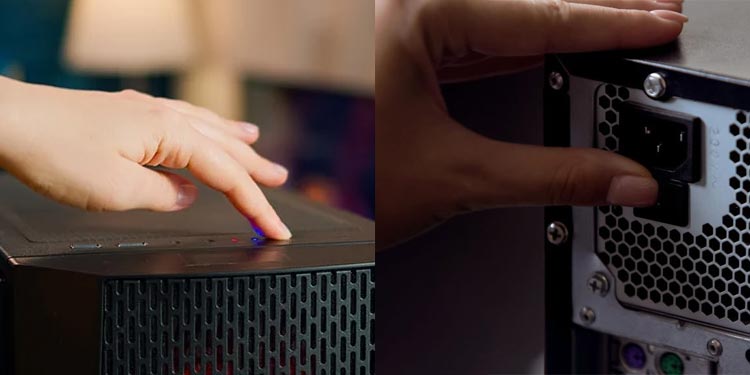
- Power off your computer and flip the switch on the PSU. Once done, unplug it from the wall and open the side of the case. Depending on your tower, the door could swing open, slide up or over, or you may have to undo screws to access its internals.

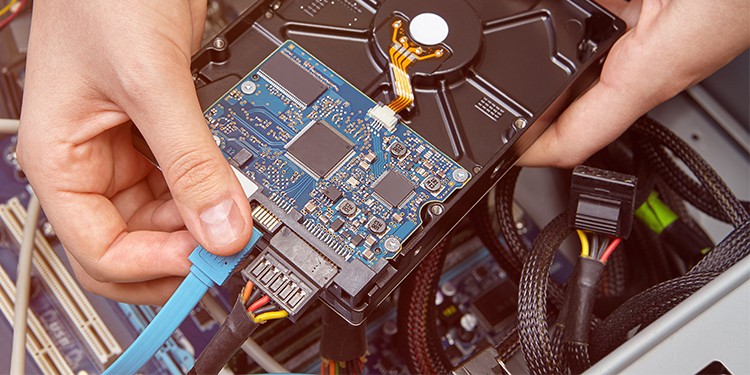
- Slide the drive into the enclosure. It will be a tight fit, but you shouldn’t have to fight to get it in place. Look at the way the other drives in your computer are mounted for a guide, if available. If not, just ensure the plugs and screw holes are in accessible positions.
- Screw the screws into place to secure the hard drive to the mount. If there are no screws, close the clips or latches as required.

Now the ports to plug things in should be accessible.
Connect the Hard Drive
The two different plugs need to be inserted before the hard drive will work. The cables may have come with the hard drive, PSU, or motherboard. If you don’t have them available, order compatible ones for both parts.
- Plug one end of the SATA cable into the appropriate slot on the HDD.

- Plug the other end into the appropriate port on the motherboard.

- Plug the other SATA cable into your HDD. Depending on the model, you may need a different cable or adapter if your PSU doesn’t have a SATA slot to power the hard drive.
- Plug the other end of the cable into the PSU.
- Plug the computer back in, switch on the PSU, and turn on your PC.
Remember to check your motherboard manual for the input labels. When you plug in your main hard drive that holds your operating system, many models have a specific, suggested port.
Software Tweaks
Once the hard drive is installed on the computer, you can do a few things to activate it.
If the drive holds your operating system, you can put bootable media like a USB into the computer and start things up. Then you can follow the steps on the bootable media to install your operating system.
However, if you want to add it as an additional drive in Windows, try a few more tweaks to get it set properly. This should only be done with a fresh new drive, not with a drive that holds the information you want to reuse.
- Right-click on the Windows icon on the left of your toolbar.
- Click Disk Management.
- Look for the new drive. The information on it will probably be unallocated at this point. Its name will depend on the other drives already detected by the system.
- Right-click on the drive.
- Choose New Simple Volume.

- Click Next. Leave the options at default when prompted unless you’re sure you want to make a change.
- Follow the prompts as needed. You can use NTFS for most things.
- Click Finish when you’re done
Now the drive is ready to use. You can start moving or downloading files onto it as needed.
How Should I Mount It?
There’s nothing wrong with using screws to mount the HDD. If anything, screws may hold it in place better than models that don’t use them. If you’re going to be moving your computer regularly, consider getting a case with screws to stabilize the HDD more.
That being said, many people find models without screws more convenient and easy-to-use. It should work just fine if you aren’t planning to hoist the computer and carry it from place to place.
What Kind of HDD Should I Buy?

Consider these tips when shopping for a standard hard drive.
- Storage Capacity: Think about what kind of capacity you’ll need and go a little higher. One of the significant benefits of standard hard drives is that they can have a vast capacity, even if you’re storing big files. Hard drives can last for years. Spending a little more for extra capacity now might mean you don’t have to swap it out for more storage later.
- Speed: Choose a drive with a faster speed over one with a slower speed. You can mitigate the heat the extra speed generates, and it will offer better performance.
- Cache Memory: Go for a larger cache over a smaller one. The cache is a kind of memory that helps facilitate the transfer of information.
Any hard drive compatible with your components that fits in your computer is a good one to choose. These are just a few things to consider to ensure you get one that’s just perfect for you.
Are There Compatibility Issues?
Most hard drives will work with most PCs. The real issue is whether your hard drive is older and uses a different cable other than a SATA. If it does, you can get an adapter, though. Just make sure you know what cables you need in advance, so you don’t have to wait on one to be delivered while you’re putting the build together.
Frequently Asked Questions
How Many HDDs Can I Install on My PC?
The number of hard drives you can install and connect to your PC depends on a few things. Check how many you can connect to your motherboard, how many you can connect to the power, and how many slots your computer tower has to know.
Will Removing an HDD Delete the Information on It?
Removing the HDD shouldn’t cause any problems, as long as you’re careful. People move hard drives with information regularly. However, the more you move it around, the more danger the information is in. Always have another backup, just in case.