Some monitors and laptop displays offer refresh rates well above the standard 60Hz, especially if you have a gaming laptop or gaming monitor. But who says they only need to be used for buttery smooth frame rates in games?
Being able to adjust your display’s refresh rate to make the most out of your system’s capabilities is a no-brainer. While you may have a display on your laptop or gaming monitor that can push well past the 120Hz mark, it may not be enabled. Luckily, on Windows 11, all you have to do is head into settings.
For more handy Windows 11 tricks to make your life easier, we’ve got you covered.
How to adjust your display refresh rate on Windows 11
To experience smooth transitions while navigating around Windows 11 and moving around apps, all you have to do is head into the advanced display settings and pick the refresh rate you’re keen on. Without a doubt, the higher you can make it, the better it will be.
Follow the steps below to change your display’s refresh rate to optimize performance.

- Open Settings.
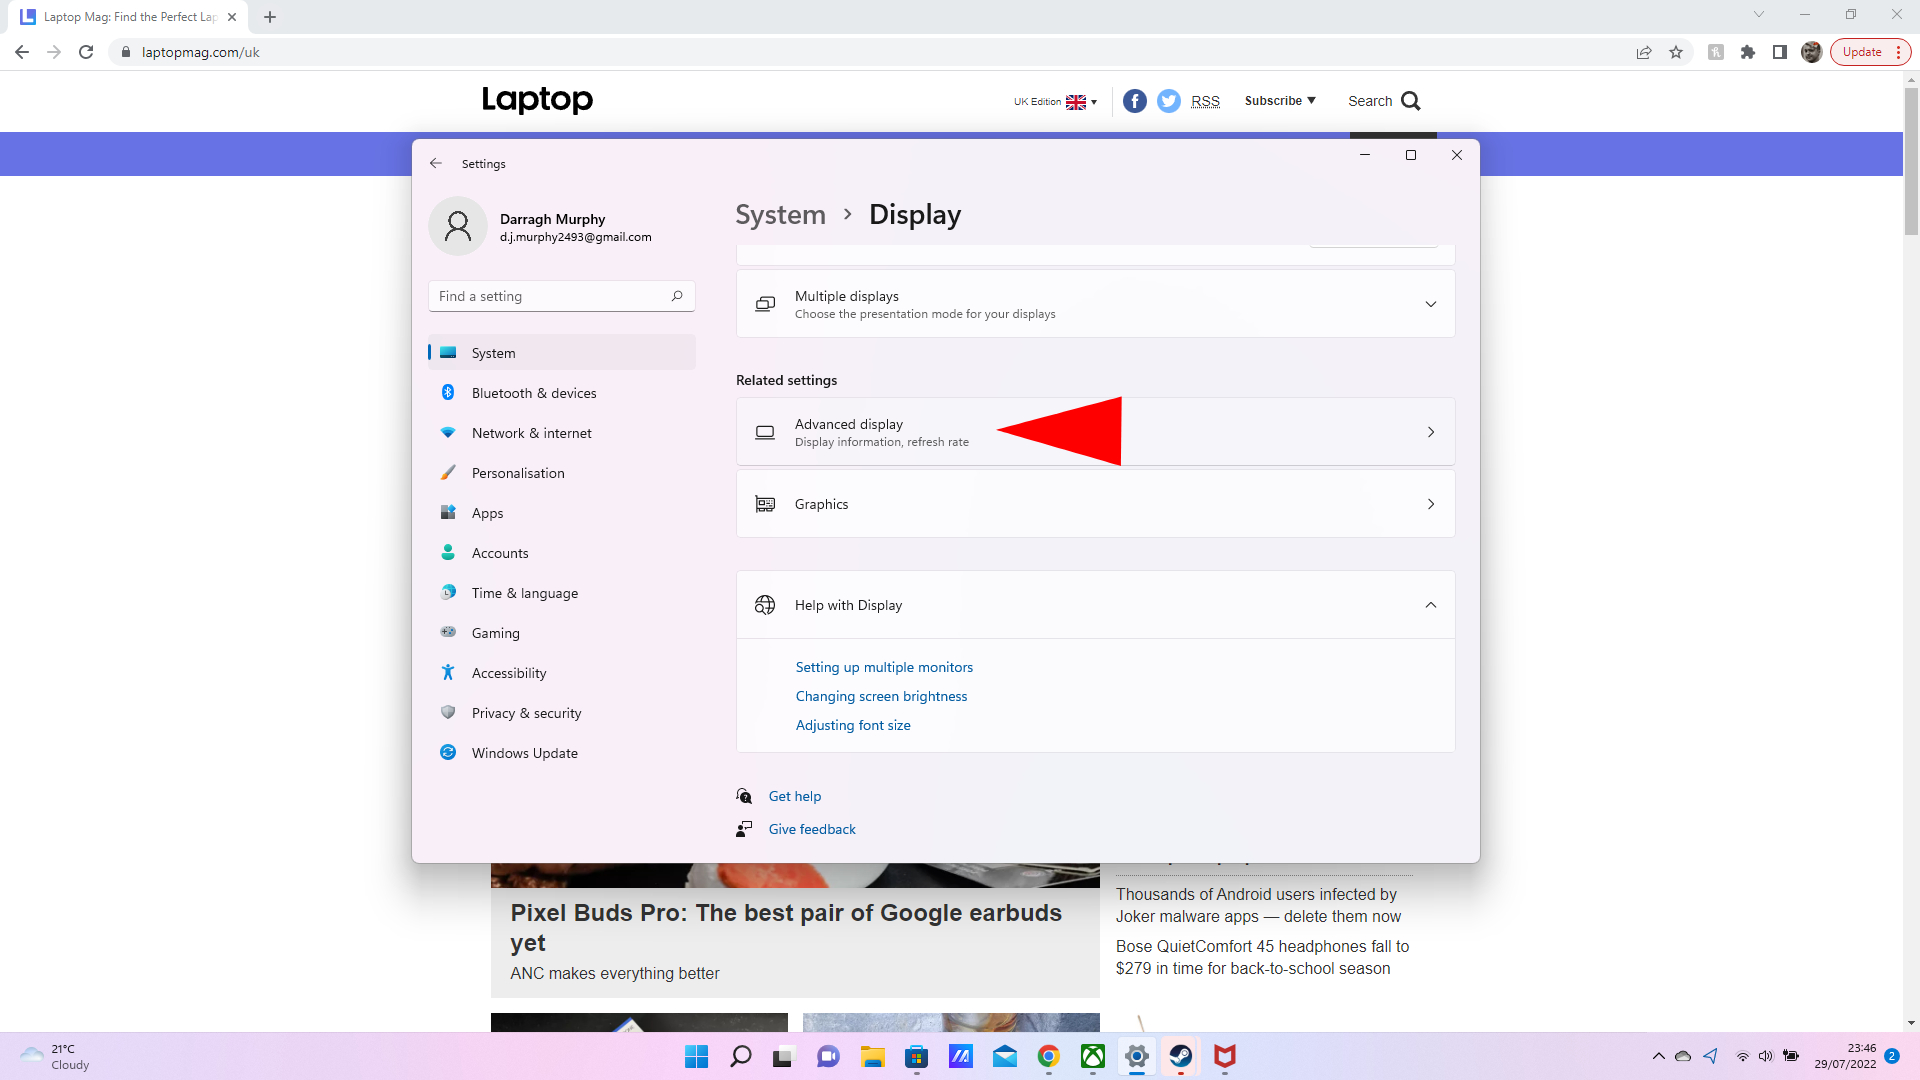
- In the Systems tab, click on Display.

- Scroll down and under Related settings, click Advanced settings.
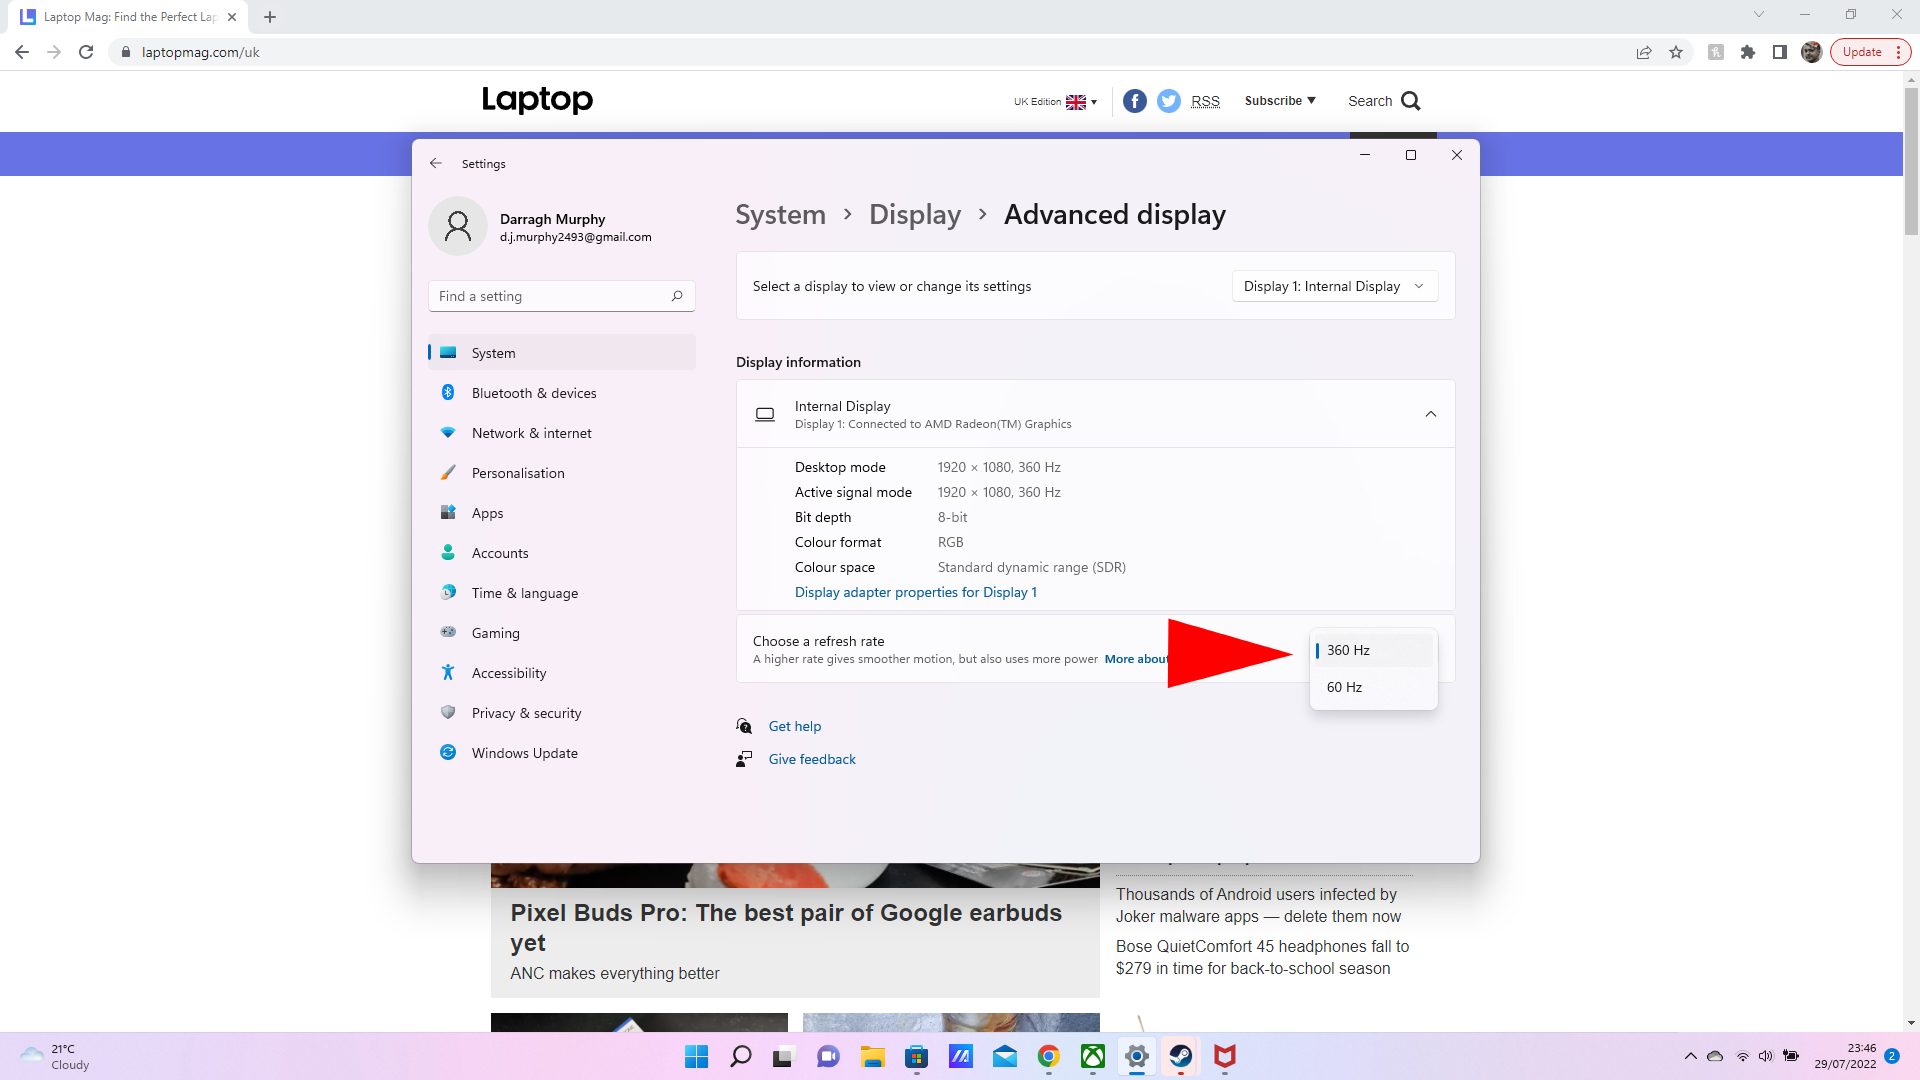
- Under Display information, you’ll find Choose a refresh rate. In the drop-down menu, select the refresh rate you want.
There you have it. If you have an external monitor, you can also select it in the drop-down menu at the top and choose the refresh rate from there to make the most out of your setup. Just be aware that there are battery life repercussions if you are doing this on your laptop when it isn’t plugged in.
For even more Windows 11 tricks to make work life simpler, look no further.