Troubleshooting hardware problems and other system issues can get complicated on a desktop PC, especially when it comes to compatibility issues when updating a personal build. One of the ways to troubleshoot PC issues is to reset the BIOS memory on your computer by “clearing” the CMOS. This will help reset misconfigured BIOS settings that may be causing hardware compatibility problems and resulting in the PC freezing during startup. Here’s how to clear CMOS (BIOS memory) on a PC motherboard.
Read more: How to update the BIOS on your computer
QUICK ANSWER
To clear CMOS on a PC motherboard, see if the motherboard has an easy-to-find Clear CMOS button This will either be on the motherboard itself or next to the I/O ports. You can also go into the BIOS utility and reset it to factory settings. Other ways to clear CMOS are removing and reseating the CMOS battery or using the CMOS jumper.
JUMP TO KEY SECTIONS
What is CMOS (BIOS memory), and why you might want to reset it
CMOS (complementary metal oxide semiconductor) is a general term used to describe the small amount of memory on a PC motherboard that stores the system’s BIOS (basic input/output system) settings, which control basic hardware and startup functionality. The CMOS is sometimes called other names like RTC (real-time clock) because it stores information like the system time, date, and other settings. You might also see generic names like NVRAM (non-volatile random access memory), CMOS RAM, and PRAM (on a Mac).
Clearing the CMOS on your PC motherboard resets the BIOS settings to the factory default. It’s a helpful way to troubleshoot problems with your PC, especially when it comes to hardware compatibility. Resetting the BIOS settings will also help if you’ve made any changes you aren’t sure of that might be causing problems. You can also use this method to reset system-level passwords on certain computers (but not laptops). In some situations, clearing the CMOS might be necessary to fix a PC that freezes, crashes often, or doesn’t turn on.
Clearing the CMOS is easier on a PC you’ve built yourself. But it might get complicated on pre-built PCs and particularly hard on laptops. If you aren’t sure whether you can manage the process yourself, it’s best to get help from a professional. Different motherboards have OEM-specific guides. So while the steps mentioned below are a good starting point, finding a guide specific to your system motherboard is best. There are a few ways to clear the CMOS on a PC motherboard, but remember that not every method may apply to your device.
How to clear CMOS on a PC motherboard
How to find your motherboard model
Joe Curtis / Android Authority
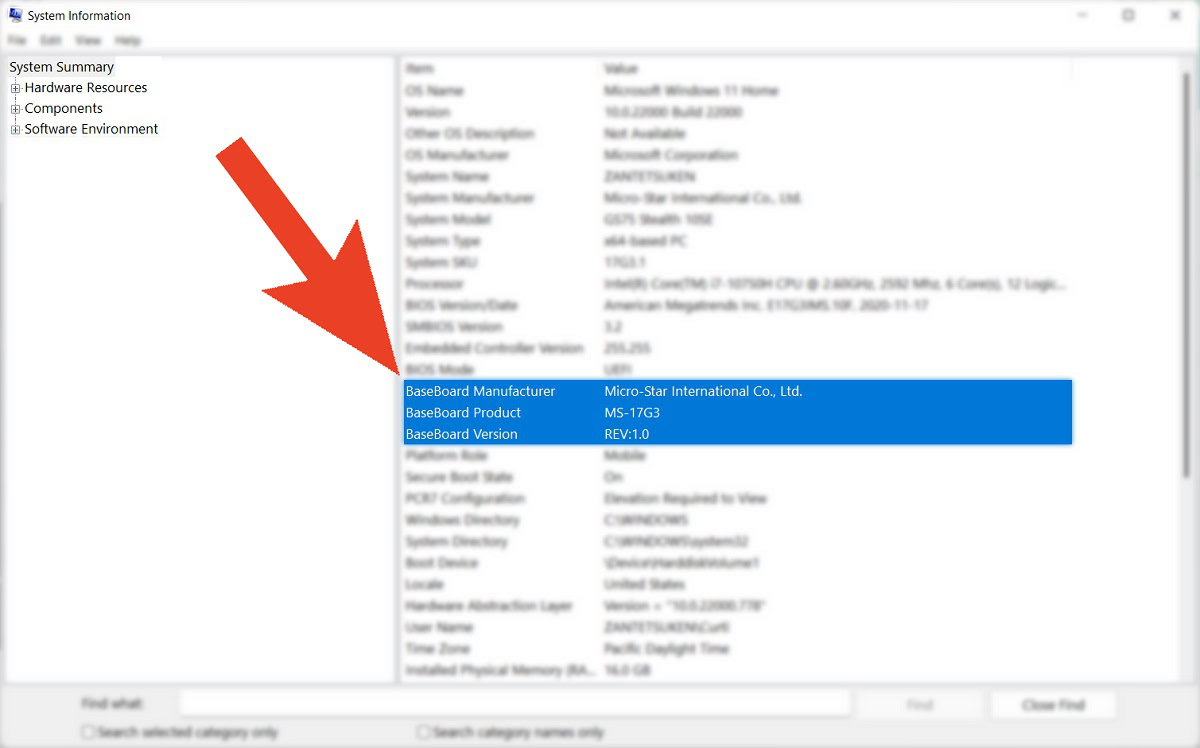
The steps mentioned below are common, but plenty of motherboards have specific instructions you need to follow to clear the CMOS. It’s best to know what motherboard you have in your PC.
Use the Windows Search bar and type System information. Open the app and look for BaseBoard Manufacturer, BaseBoard Productand BaseBoard Version to find your motherboard information.
Clear CMOS with the reset button
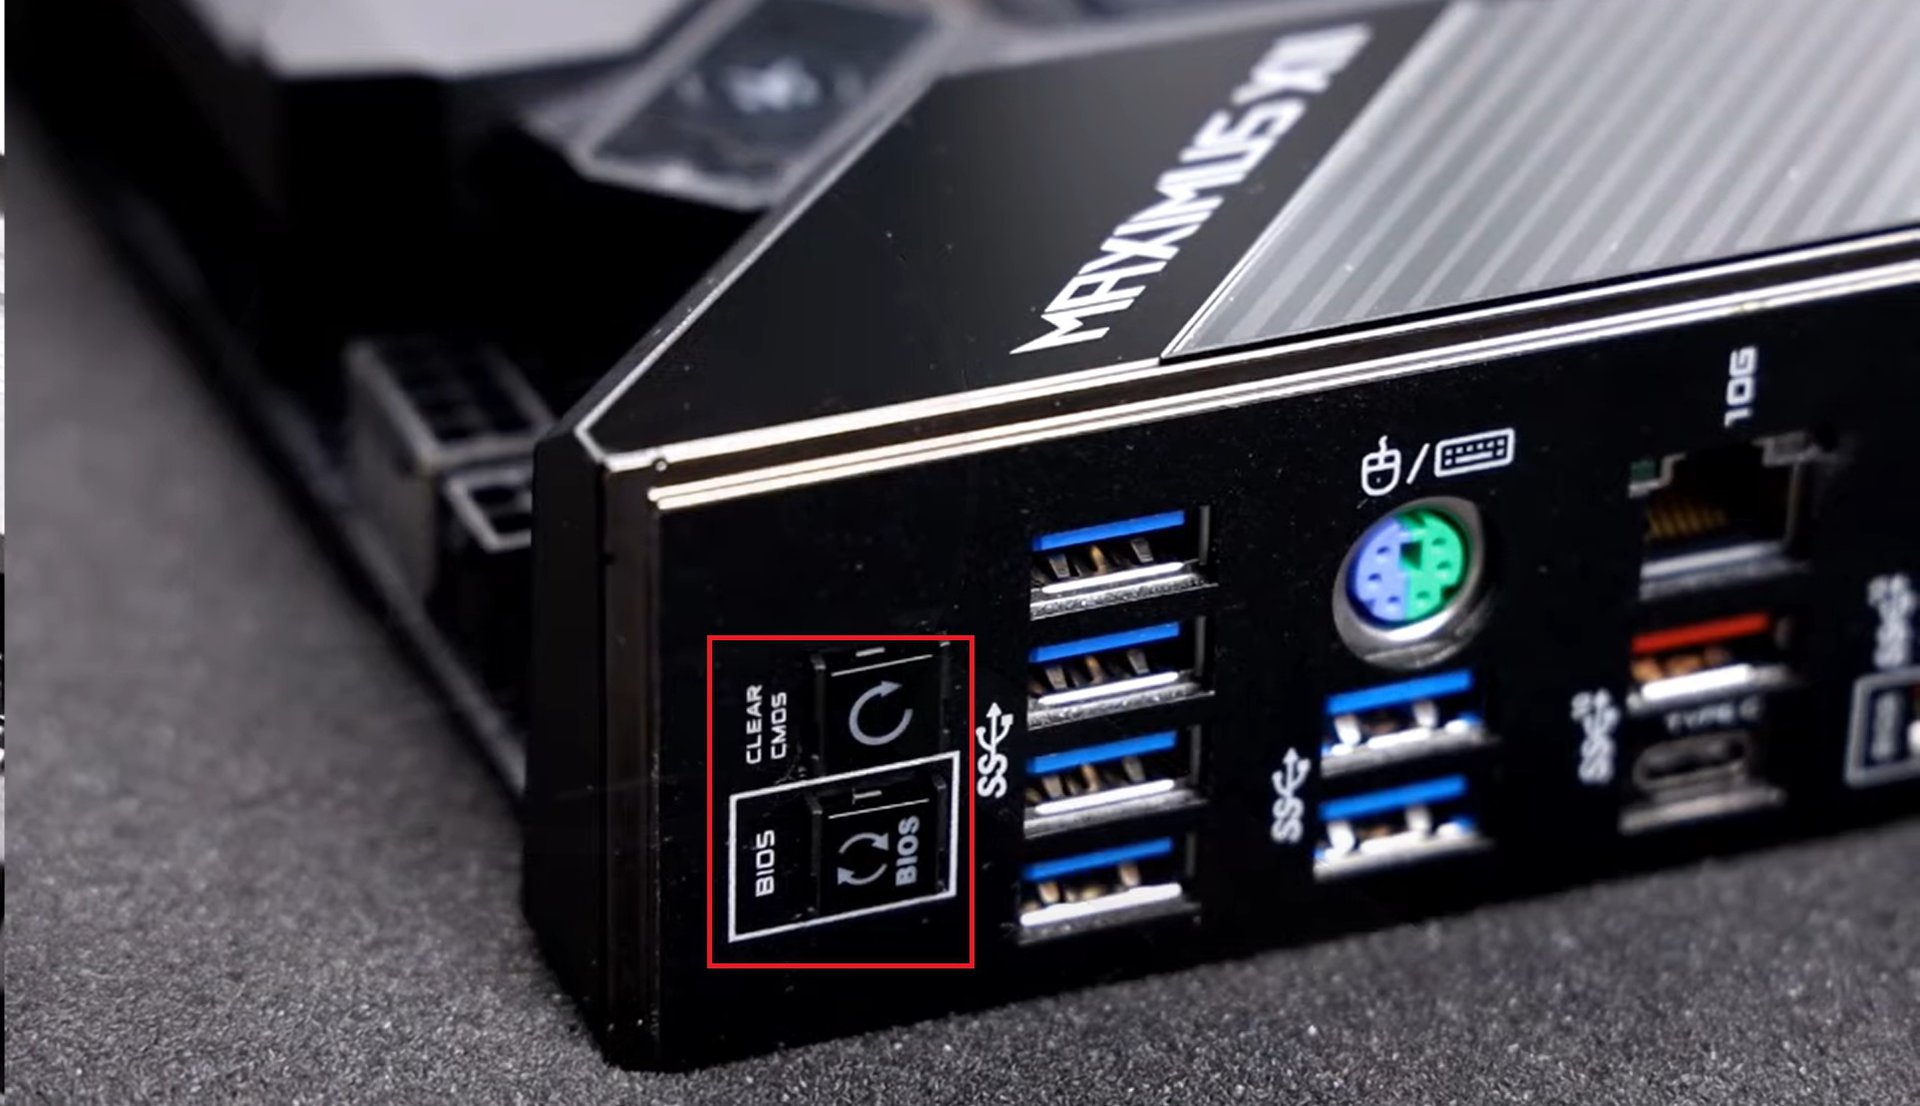
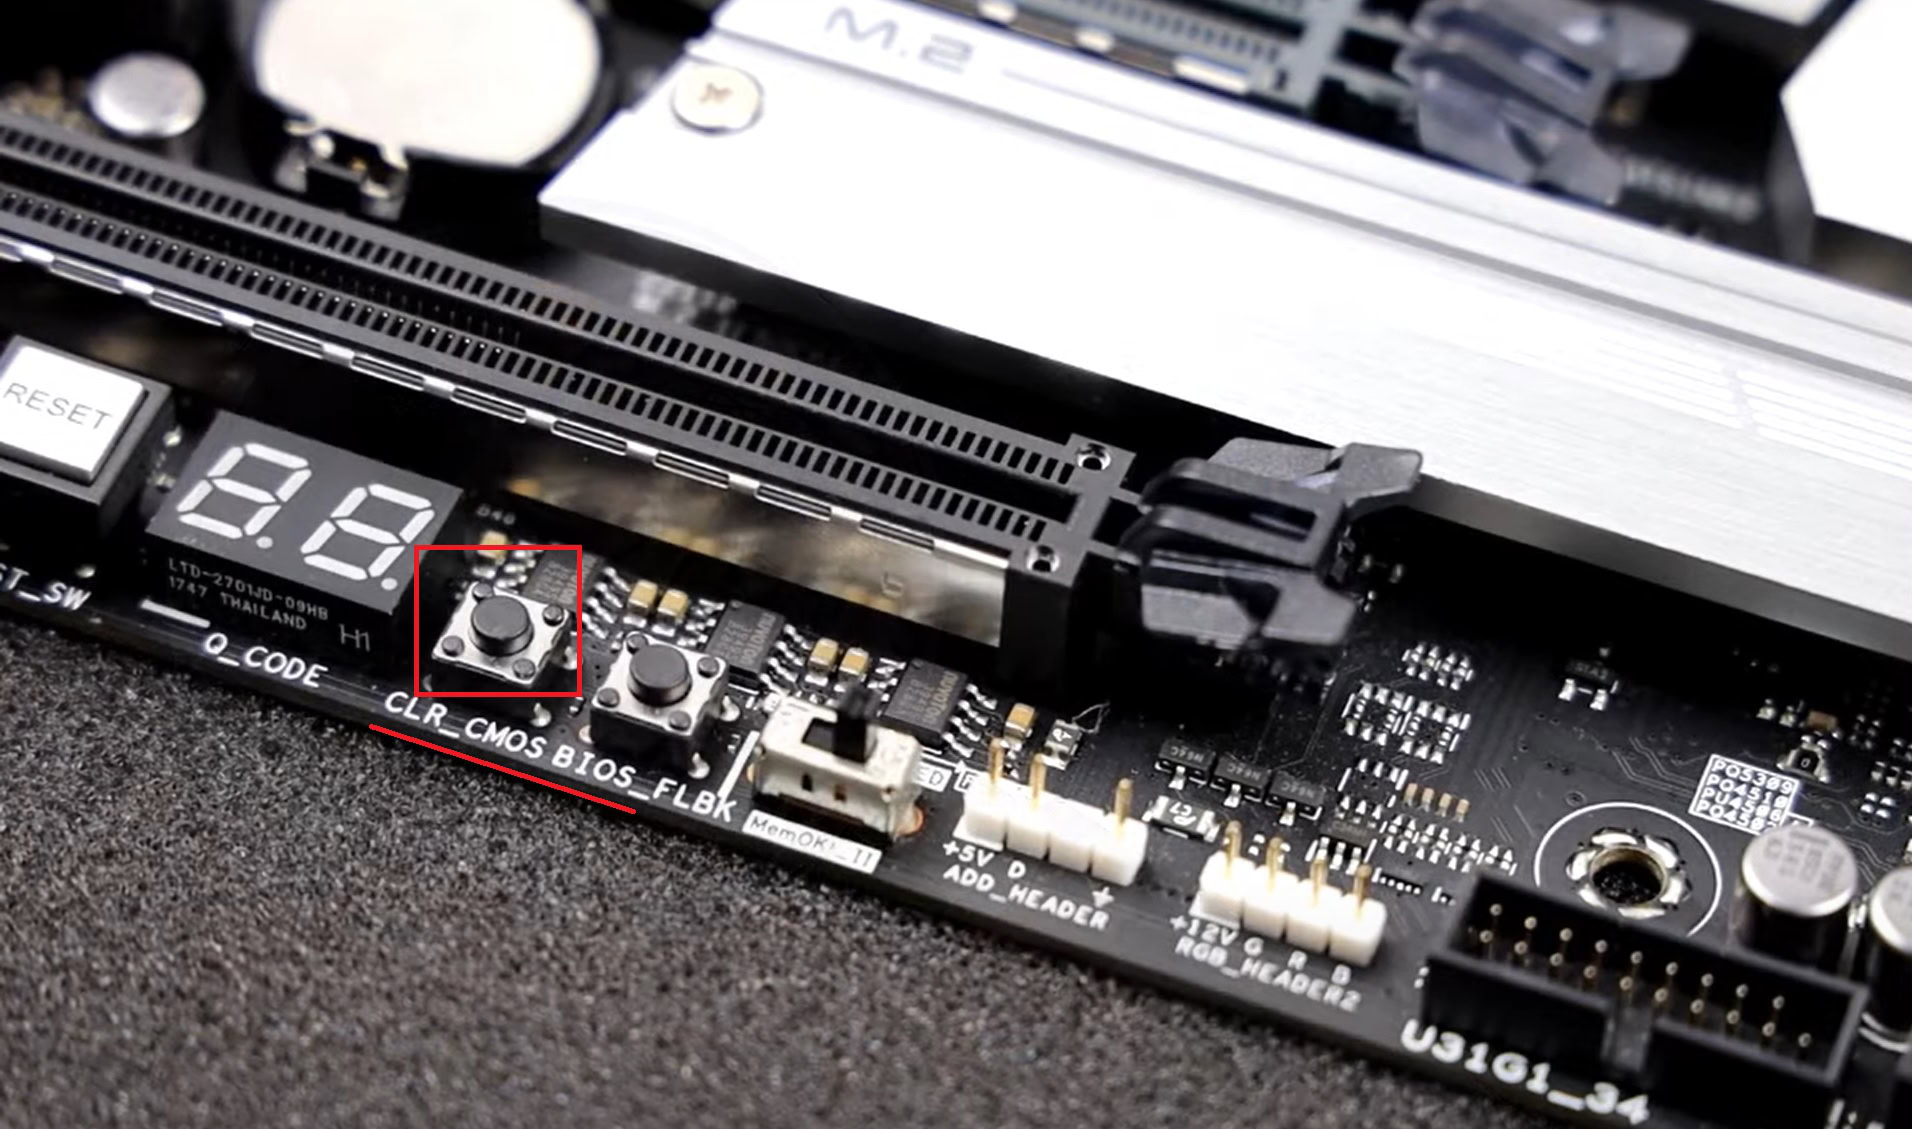
This method is very device-specific but is the easiest way to clear the CMOS on your motherboard. Some motherboards have a reset button on the board itself, or you’ll find it near the I/O ports on the case. Some, like the ASUS motherboard pictured above, have two buttons, one to clear the CMOS and the other to reset the BIOS. Press the Clear CMOS button for around ten seconds to reset the system. If you find a separate BIOS button, press it to reset the BIOS to factory settings.
There are a few variations to this method you should be aware of. You might see a recessed button on some systems, particularly pre-built PCs, to ensure you don’t accidentally press it. You will need a pin or something like your phone’s SIM tray tool to press the button. If the switch is on the motherboard itself, the Clear CMOS button will be clearly labeled and easy to find. Press and hold the button down for around ten seconds to clear the CMOS and reset the BIOS.
There might also be a difference in the power requirements. Some manufacturers recommend turning off your system and unplugging it entirely before clearing the CMOS. Others may recommend keeping the device powered on. Check the guide to ensure that you are following the correct method. You will likely have to power off and unplug the computer in most cases.
Remember that not every motherboard will have such accessible buttons. You will have to rely on other methods on this list in that case.
Use the BIOS utility
One of the main reasons to clear CMOS is to reset the BIOS to default settings. If you don’t have a convenient button within reach, you can try resetting the BIOS through the utility itself. There are different ways to enter BIOS on a Windows PC. But if you don’t have any major software problems, go to Start > Settings > Update and security > Recovery. Select Restart now under Advanced startup and choose Troubleshoot.
Look for the reset option within the BIOS. The menu might differ depending on your device, so look for similar phrases Reset to default, Load factory defaults, Clear BIOS settings, Load setup defaults, and more. Confirm your selection to reset the BIOS.
Remove and reset the CMOS battery
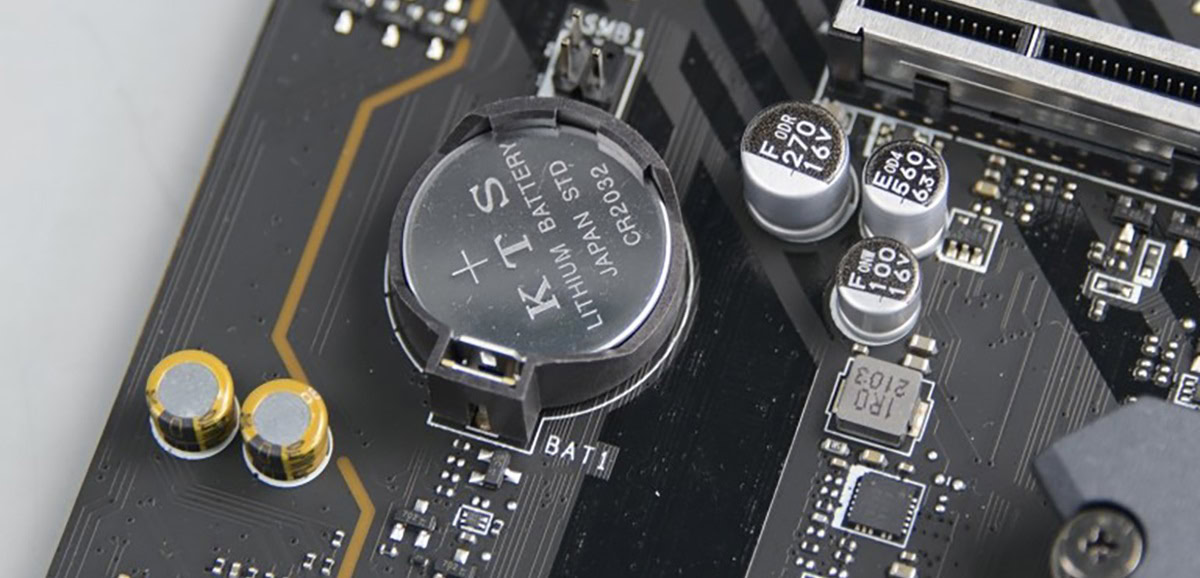
Another way to clear the CMOS is to remove the CMOS battery. Turn off and unplug your computer and disconnect all attached peripherals. Open the PC case to access the motherboard and find the CMOS battery. It is a standard circular CR2032 battery which should be easy to find. You might also want to replace the CMOS battery if it is older than five years.
The battery will be in a holder and easier to recognize. However, it might be covered and connected to the motherboard with a wire. The latter is more likely on a laptop, but you will see it on some desktop PCs too.
If the battery is in a holder, note the orientation (the placement of the positive and negative) and gently remove the battery. You will need an appropriate tool to do so since it might be challenging to remove the battery with your fingers. If the battery is connected to the motherboard with a wire, unplug the wire. Wait a few minutes before placing the battery back in the holder or reconnecting the wire.
Again, the method might be a little different depending on your system. Some motherboards have a metal clip on top of the battery. Slide the battery from under the clip and ensure you don’t bend the clip. After you unplug a desktop computer, press the power button multiple times. If possible, disconnect the laptop’s main battery before removing the CMOS battery.
Finally, remember that not every system might have a removable CMOS battery. Don’t force it if the battery doesn’t come out with gentle prying.
Use the motherboard jumper to clear CMOS
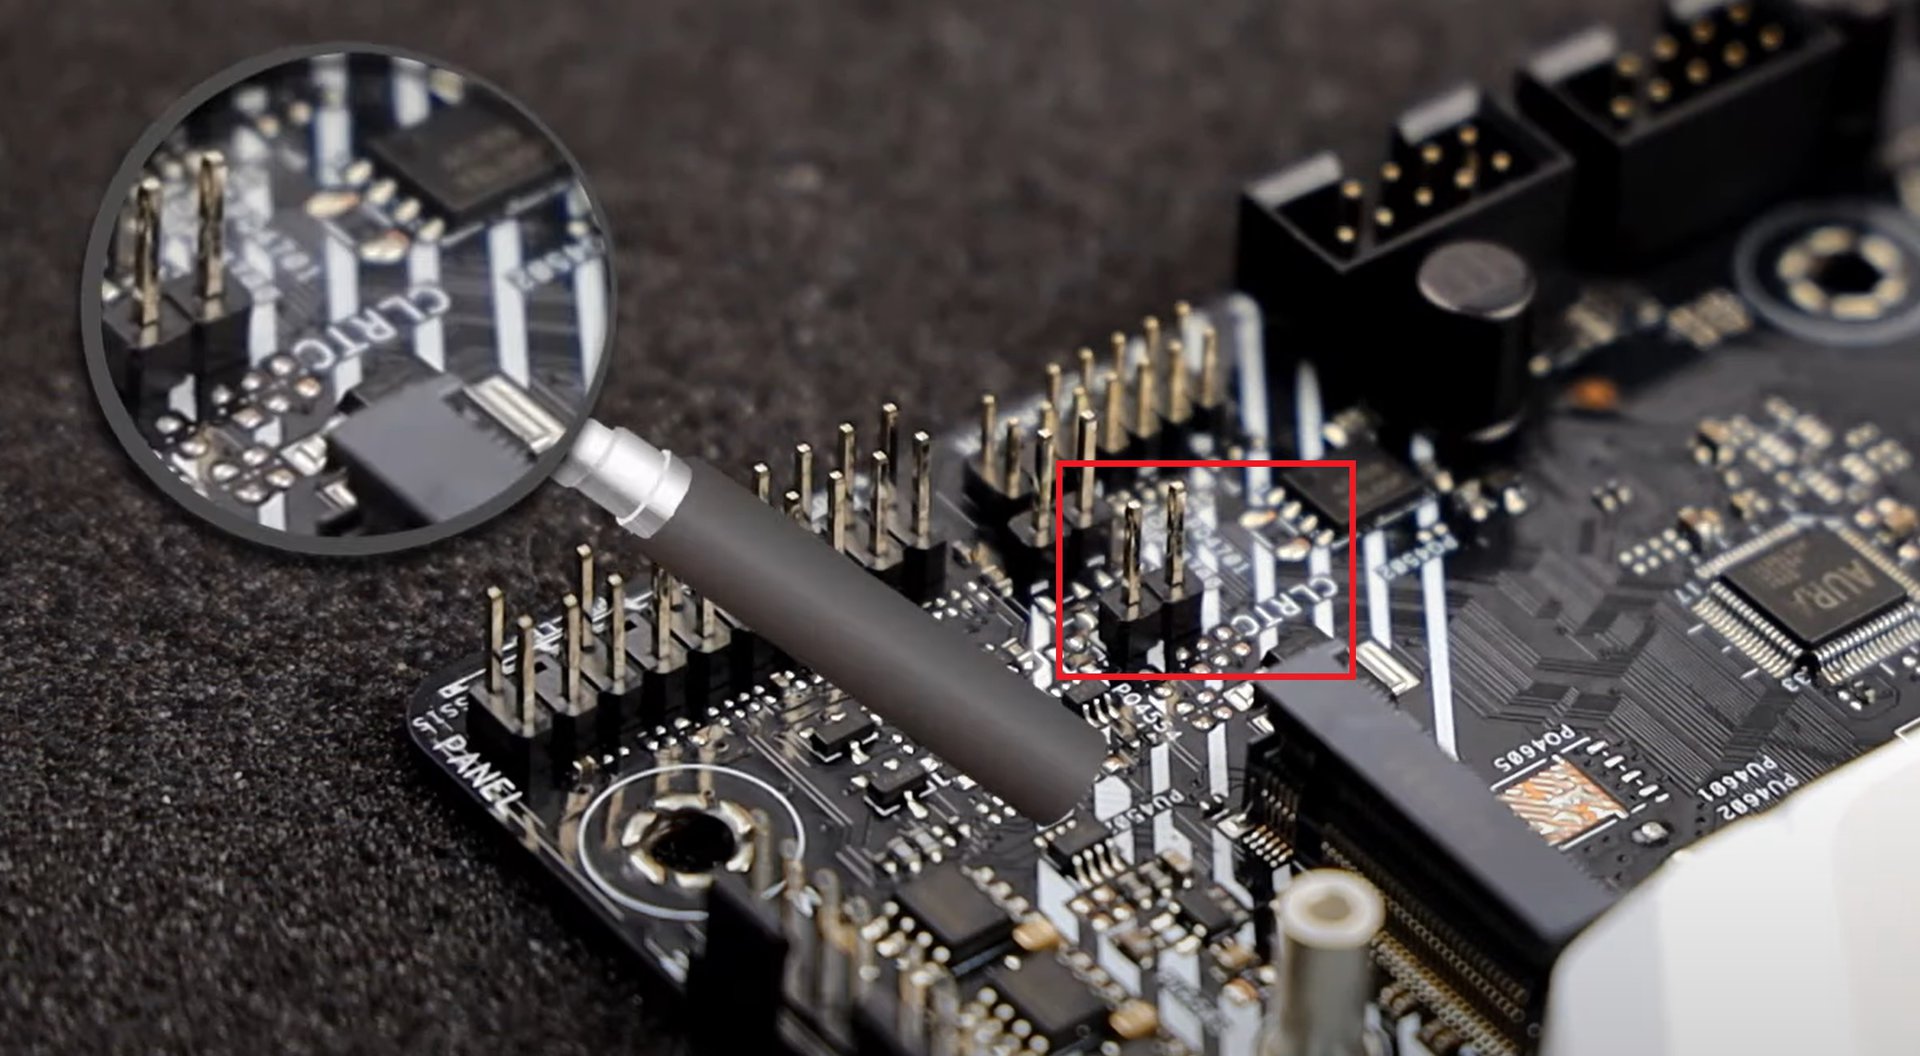
Some motherboards may not have a convenient button to clear CMOS, but you will find a CMOS jumper. However, this method mainly applies to desktop computers and not laptops.
Depending on your system, the CMOS jumper has two or three pins (depending on your system) and is usually located near the CMOS battery or the BIOS chip. You can find the exact location by referring to your device’s user manual. Look for a label that says CLEAR_CMOS, JBAT1, CLRPWD, PASSWORD, CLEARTC, RESET CMOSor clear.
Turn off and unplug your PC from the power source. With a three-pin setup, move the jumper from where it is already (positions 1 and 2) and place it on the other pin (positions 2 and 3). With a two-pin setup, simply remove the jumper. Wait a few minutes and move the jumper back to the previous position.
Once again, the method might be slightly different, so it’s best to find the guide for your exact device. For some, you might need to power on the computer while the jumper is in the Clear position (positions 2 and 3), then turn it back off and move the jumper into the default place.
On some two-pin setups that don’t come with a jumper, you can short the pins using another jumper from the motherboard or with a metal object like a screwdriver, but ensure you aren’t touching the metal directly. Hold the object to the pins for up to ten seconds.
Read more: How to change the Windows boot drive in the BIOS